Sign your PowerShell Scripts
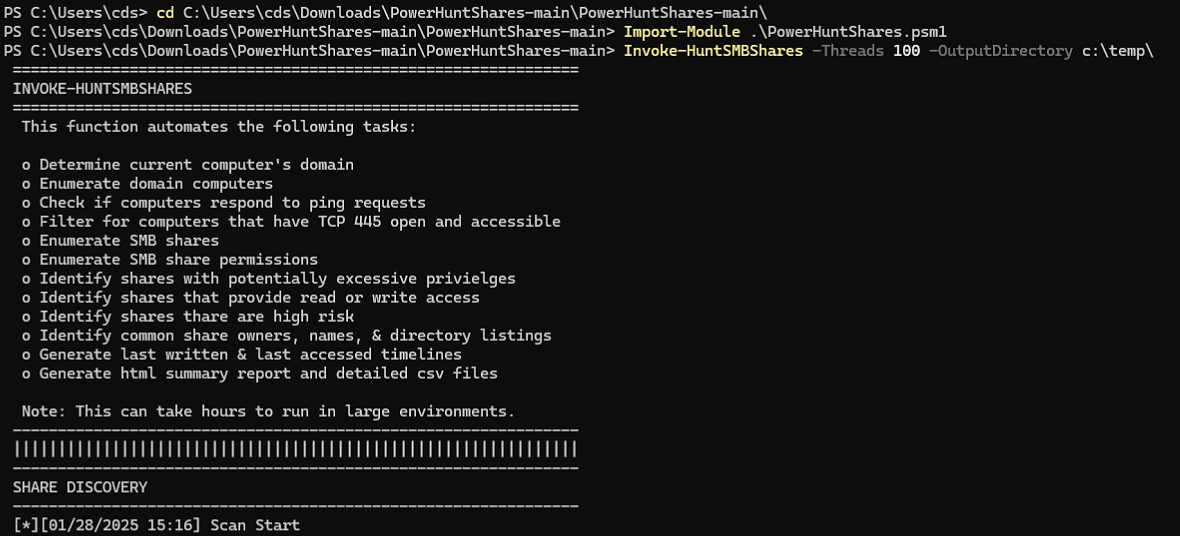
During a recent penetration test, I wanted to run PowerHuntShares, a PowerShell script designed to find secrets in shared resources and much more. If you haven’t heard of it before, I highly recommend checking it out.
RemoteSigned
The output of Get-ExecutionPolicy -List displays the execution policies defined across various scopes. Let’s analyze it to understand which scripts can be executed based on the settings found on the device during the penetration test:
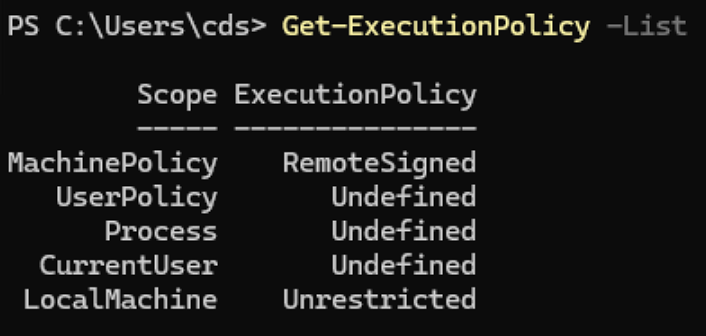
Execution Policies in Effect
MachinePolicy: RemoteSigned
- Scripts downloaded from the internet must be signed by a trusted publisher.
- Local scripts (on the machine) can run without being signed.
LocalMachine: Unrestricted
- No restrictions on scripts. All scripts can run, including those downloaded from the internet. However, you may receive a warning before running a script downloaded from the internet.
Effective Execution Policy
The precedence of the execution policy order is determined by the highest priority scope with a defined policy. The priority order is:
- MachinePolicy: Set by a Group Policy for all users of the computer.
- UserPolicy: Set by a Group Policy for the current user of the computer.
- Process: The Process scope only affects the current PowerShell session. The execution policy is saved in the environment variable
$env:PSExecutionPolicyPreference, rather than the configuration file. When the PowerShell session is closed, the variable and value are deleted. - CurrentUser: The execution policy affects only the current user. It’s stored in the CurrentUser configuration file.
- LocalMachine: The execution policy affects all users on the current computer. It’s stored in the AllUsers configuration file.
Based on our output, the effective execution policy is RemoteSigned because it is set at the MachinePolicy scope, which takes precedence over LocalMachine.
What Scripts Can Be Executed?
Given the RemoteSigned policy in effect:
Allowed:
- Scripts written and stored locally.
- Scripts downloaded from the internet, if they are digitally signed by a trusted publisher.
Blocked:
- Unsigned scripts downloaded from the internet.
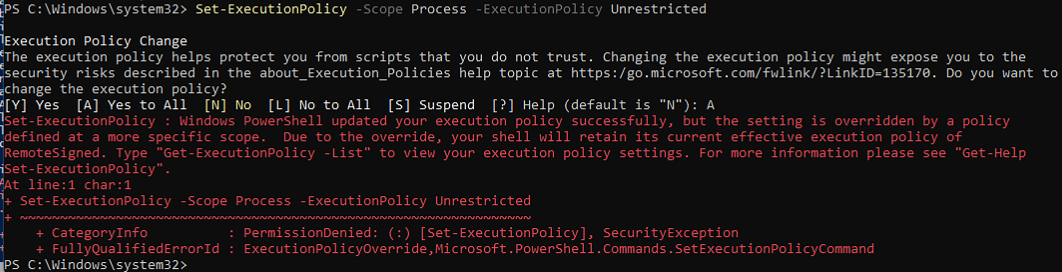
Set-ExecutionPolicy
Just set your execution policy to unrestricted bro. Well it is set through a GPO and scoped to LocalMachine…
Set-ExecutionPolicy -Scope Process -ExecutionPolicy Unrestricted
Signing PowerHuntShares
So how do we go about signing our own powershell script? To start, you’ll need a self-signed certificate. This certificate will act as the key to sign your script. The following PowerShell commands will generate the certificate:
#Parameters
$CertificateName = "PowerShell Code Signing"

#Create a Self-Signed SSL certificate
$Certificate = New-SelfSignedCertificate -CertStoreLocation Cert:\CurrentUser\My -Subject "CN=$CertificateName" -KeySpec Signature -Type CodeSigningCert

#Export the Certificate to "Documents" Folder in your computer
$CertificatePath = [Environment]::GetFolderPath("MyDocuments")+"\$CertificateName.cer"
Export-Certificate -Cert $Certificate -FilePath $CertificatePath

#Add Certificate to the "Trusted Root Store"
Get-Item $CertificatePath | Import-Certificate -CertStoreLocation "Cert:\LocalMachine\Root"

Write-host "Certificate Thumbprint:" $Certificate.Thumbprint
As shown in Figure 4, this process generates a self-signed certificate with a thumbprint that you’ll use in subsequent steps.
Once your certificate is ready, it’s time to sign the PowerHuntShares script. This step is critical to ensure the script runs on machines with restricted execution policies. Here’s how to sign the script:
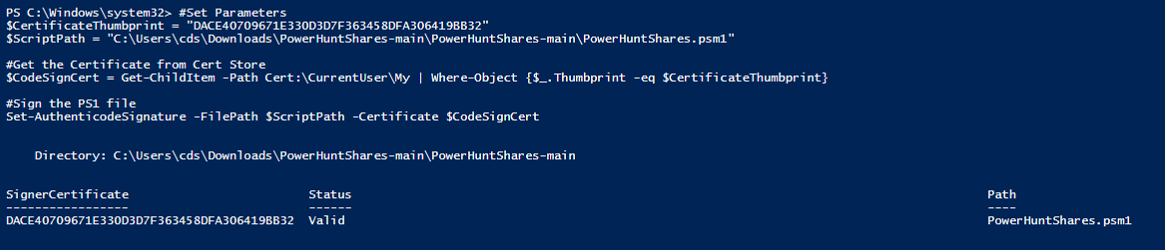
#Set Parameters
$CertificateThumbprint = "DACE40709671E330D3D7F363458DFA306419BB32"
$ScriptPath = "C:\Users\cds\Downloads\PowerHuntShares-main\PowerHuntShares-main\PowerHuntShares.psm1"

#Get the Certificate from Cert Store
$CodeSignCert = Get-ChildItem -Path Cert:\CurrentUser\My | Where-Object {$_.Thumbprint -eq $CertificateThumbprint}

#Sign the PS1 file
Set-AuthenticodeSignature -FilePath $ScriptPath -Certificate $CodeSignCert
In Figure 5, you can see the signed PowerHuntShares script with its certificate applied successfully.
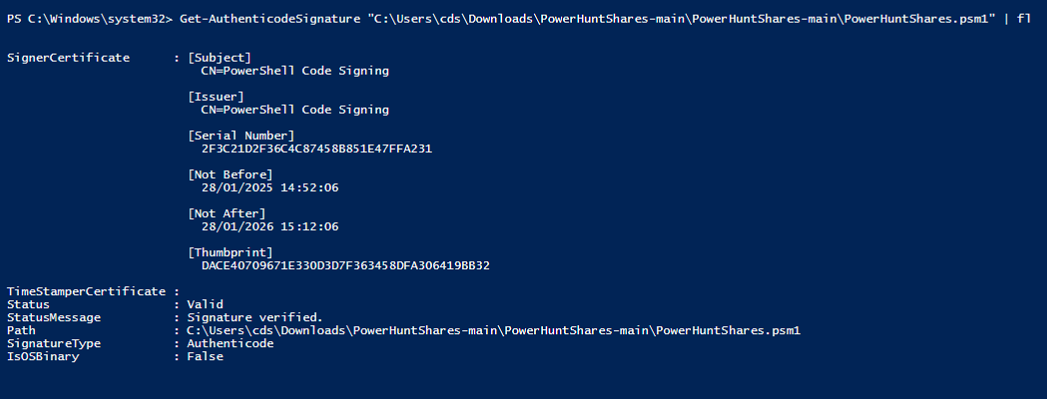
After signing, it’s good practice to verify the script’s signature to ensure the process worked as intended. Run the following command to check:
Get-AuthenticodeSignature "C:\Users\cds\Downloads\PowerHuntShares-main\PowerHuntShares-main\PowerHuntShares.psm1" | fl
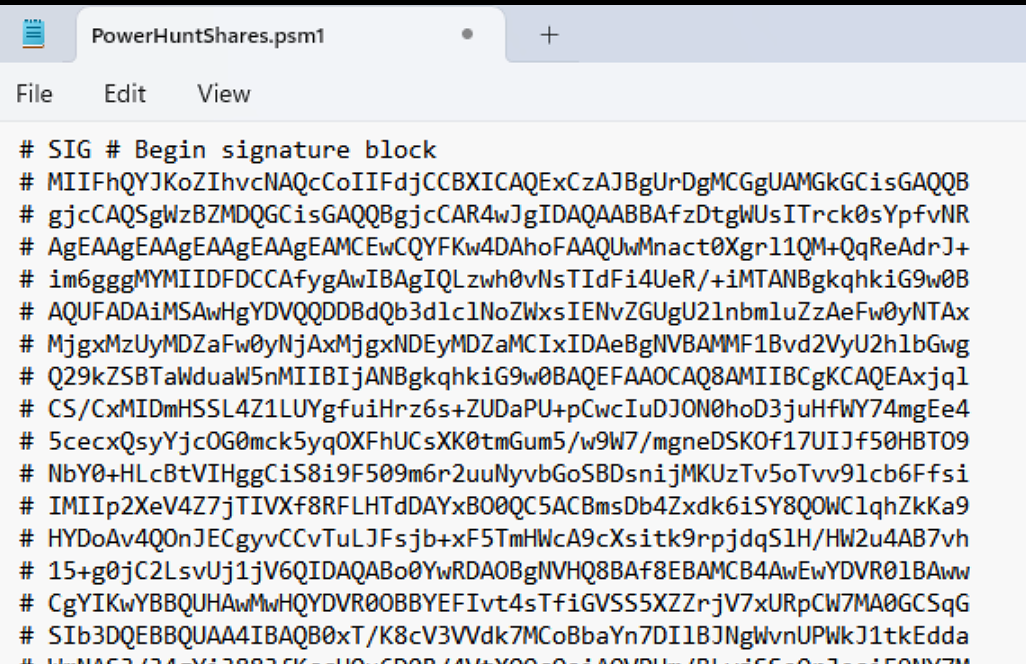
As seen in Figure 6 & Figure 7, which confirm the script is properly signed, making it ready for execution.
Running the signed script
With the script signed, you can now execute it seamlessly, even in environments with restrictive execution policies. By using Invoke-HuntSMBShares, you can automate the discovery of SMB shares efficiently.